Uncategorized
Cloning Cannabis: How to Clone Weed Plants
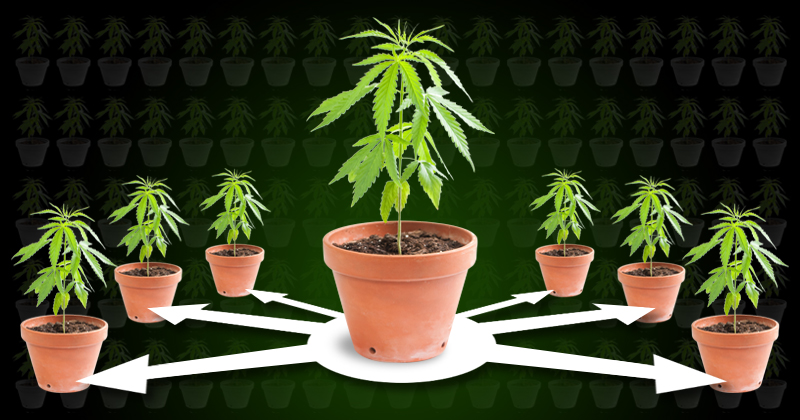
A clone is a cut taken from a living marijuana plant, which will eventually develop into a new plant. The genetic makeup of the clone is identical to that of the mother plant, which is referred to as the mother.
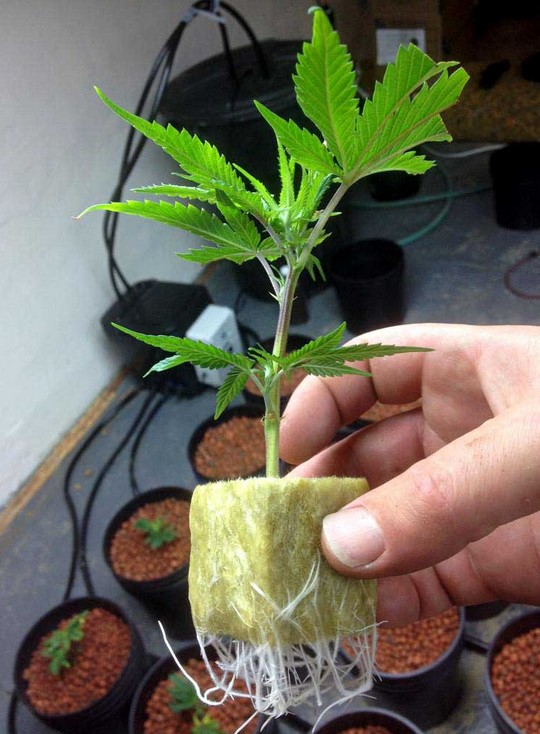
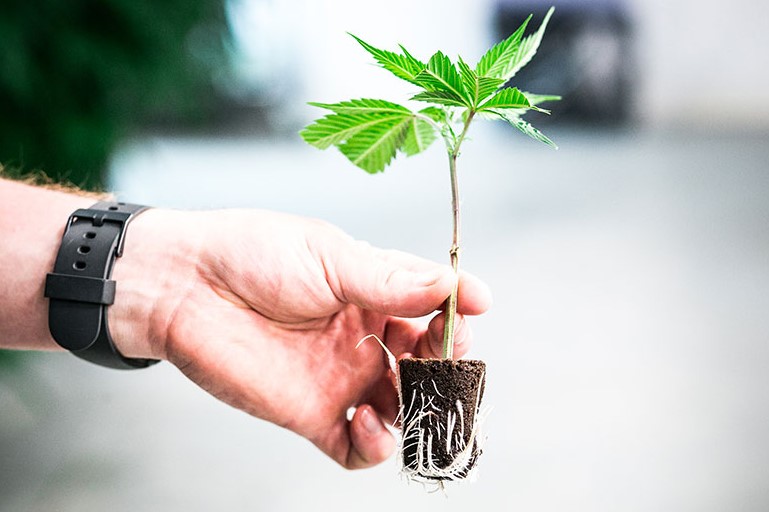
Clones are created by using cuttings from the mother plant, which is then planted into a medium such as a root cube and sprayed with a hormone to stimulate root growth. They’re typically about 6 inches long, with an additional inch or two for growing room. Once they’ve been separated from the mother plant, the clone is put into a medium like a root cube and given a hormone to encourage root development.
It’s transplanted from container to ground or pot after roots have formed, and it grows like any other weed plant.
Why clone cannabis plants?
Clones are an excellent alternative for starting a marijuana plant if you don’t want to deal with seeds. Cloning your own cannabis may save you time—even though rooting out is required, you do not have to germinate seeds, which will save around a month of growth time.
Clones will also save room in your garden—seeds necessitate the cultivation of many, which must be sexed out to identify and eliminate the males. Also, sometimes certain seeds fail to germinate. You’ll need more space for all those seeds, and they may not even grow into full plants.
Clones are not costly. You only need to invest in some materials if you take a clone from a plant you already have. If you want, you can purchase clones from a dispensary instead.

Clones are genetically identical copies of the mother plant from which they were taken and, as a result, are some of the most accurate representations of cannabis available. You may take clones of your favorite marijuana plant again and again to cultivate it ad infinitum if you possess one.
There is some debate about whether clones degrade over time as a result of environmental stressors and other factors, although that issue is open to discussion.
What is a cannabis mother plant?
A mother plant is any cannabis plant that you take a clone from. Maintain the health and robustness of your mothers, since their genes will be passed on to the clones—if you produce sickly offspring, your parents will likely do so as well.
Clones are always removed from the mother plant, no matter how far along they get. It’s crucial not to take cuttings off a flowering weed plant; this can cause the clone to become hermaphrodite and harm the plant.
Some growers have solely mother plants for taking cuttings, but this takes up a lot of room and resources—you’ll need to keep the mother plant alive, but you won’t get any buds off it since it will always stay in the vegetative stage. Some growers find it challenging to justify devoting time, energy, and space to plants that won’t produce buds in a confined area. If your grow area is limited, this may not be the greatest option.
Another approach that growers use is to take cuttings from a group of mother plants before they blooming, then flip the mothers into the flowering stage. The next generation of clones is established, and when they become big enough, cuttingtings will be taken from them before being turned into flowers. Clones are genetically identical, so each generation will be a precise copy of the first-generation mother and all subsequent moms.
Cannabis mother plants guarantee genetic uniformity, so subsequent generations of clones will have similar tastes, flavor, effects, and other characteristics. Clones will generally develop at the same speed as the mother and produce a similar high-quality product while growing at the same intensity.
Clones ensure that all of your cannabis plants are female, so you don’t have to waste time on growing from seed, sexing plants, or getting rid of males.
What to look for in a mother plant
It’s critical to find a decent mother plant when selecting a clone from the same father and mother. A wilty plant or one that doesn’t produce excellent buds will not make a suitable parent.
Growers usually look for these qualities in a mother plant:
- Sturdy, vibrant growth
- Great aromas and flavors
- Big yields
- Dense trichomes
- Resistent to pests and mold
How to clone a cannabis plant
What do you need to clone cannabis?
Cloning cannabis is a simple process that only requires a few essential tools.
- Scissors (for taking cuttings off the mother plant)
- Razor (for trimming up cuttings)
- The rooting setup (tray/tray-cell insert/dome/root cubes/heat mat, or an auto-cloner)
- Rooting hormone
Choose a rooting medium and setup
Rooting cubes, which are comprised of rockwool or other non-soil analogues like peat or foam, are the most common rooting media. Rockwool is a thread of melted rock that has been spun into a fine mesh. These cubes can be found in most grow shops and online.
If you’re using cubes, you’ll need a tray, a tray-cell insert, and a dome. The cloned plants will be placed in the cubes, which will go into the tray-cells, and the entire setup will sit in a tray with water. Make sure to use a dome to keep humidity at bay and you may even want to consider using a heat mat.
Another option is to utilize an auto-cloner. There is a upfront cost to purchasing an auto-cloner, but they are worth the investment if you intend on cloning many plants. Auto-cloners automate the process of caring for clones by reducing manual labor. To promote root development, these machines administer nutrient water to the bottoms of your cuts at defined intervals using aeroponics.
Experiment to see which combination works best for you. Whichever technique you pick, make sure your new duplicates get enough of light—ideally 18 hours each day—as well as humidity.
How to take a cutting from a cannabis plant

Choose a mother plant for cloning from while looking for ones that are healthy, sturdy, and have at least two months into the vegetative cycle. Don’t remove your clone from the plant until it begins to bloom.
Don’t fertilize mother plants for a few days before taking cuttings. This will allow nitrogen to leave the leaves. When you take cuttings, there will be too much nitrogen in the leaves and stems, enticing your clones to try to develop vegetation rather of concentrating energy on rooting.
Gloves should be worn and razors, scissors, and other cutting instruments should all be cleaned in a clean area.
To take a cutting:
- Look for branches with two or more nodes on the final cutting. You’ll need at least two nodes on the end of the branch, so choose a healthy and long one. A robust clone will result in a sturdy plant.
- Cut the clone from the mother plant at or above the node. Scissors are OK; it might be difficult to insert a razor in the midst of the mother plant.
- When you’re finished planting, use a razor to cut below the bottom node on the new cutting at a 45° angle from the branch. This will increase the surface area of the rooting surface, allowing for faster development.
- Put your fresh cutting in a rooting hormone as soon as possible. Then, place it right in the root cube. If you’re using an auto-cloner, wrap it in a collar and put it into the machine; after all, you’ll be putting rooting hormone in the cloner.
- Remove any extra leaves from the bottom of the cutting and trim off the tips of remaining fan leaves on the chopping after completing it. This helps your clones to absorb nutrients and water by allowing them to do so.
Transplanting your weed clones
Check your auto-cloners once a day to ensure they have enough water by checking the bottom of the tray or auto-cloning. To raise humidity, spray water on the leaves with a spray bottle. Any clones that die should be removed so as not to cause mold in the rest of the clones and to provide more room for the remaining ones.
In 10-14 days, most seedlings will be ready to transplant into soil, but some will grow out more quickly, and others will take longer. When the white roots are about an inch or two long, they’ll be ready.
Keep the area around the transplants clean before you begin. Transplant shock is a possibility, so don’t handle your clones with bare hands.
To transplant:
- Put soil in your pots first.
- It’s a good idea to water the soil before transplanting in order for the soil not to shift once the clone is in its new location.
- Once the water has drained, dig a hole 1-2 inches deep with two fingers or just enough to conceal all of the roots.
- Put the clone in and gently cover with soil.
What to look for when buying a marijuana clone
If you live in a medical or adult-use state, local marijuana businesses will be able to provide you with clones, but be sure it’s a reliable one.
The majority of these duplicates are produced by growers who only focus on cloning, but occasionally cuttings come from a third party. Always inquire about the source of your clones when purchasing them for your home garden. If you can’t get an honest response, look for another option.
It’s crucial to understand where your clones came from since that is when issues begin—diseases, pests, mislabeled genetics, and unknown pesticide residues can all be a result of a secret clone.
Before you acquire clones, don’t be hesitant to conduct research on a dispensary or grow facility.
Inspect the cannabis clones
It’s difficult to identify every bug, pathogen, pesticide residue, or genetic marker with the naked eye. However, before bringing them into your garden, give your clones a thorough examination. If they appear unhealthy or weak, they are unlikely to thrive.
Stem width
The stem width of a clone can be an excellent indicator of its overall health and vitality. Thin and narrow stems usually indicate that the clone was taken from a sick or less viable limb. These cuttings are more likely to become diseased or die, as well as take longer to establish their roots.
Pests
Check for any pests in your clone’s surroundings to ensure that they are not present. Fungus gnats and spider mites, for example, may be readily recognized as adult insects.
Examine each leaf for infestation, and search the ground for eggs and larvae. Some pests reside in the soil medium or under the leaves, so check there as well. Spider mites leave patches and webbing, while other insects leave trace bite marks.
Disease
Numerous illnesses may be difficult to detect in cuttings, but there are a few early visual symptoms. A lack of vitality is an important signal—look for limping leaves, abnormal or deformed growth, and discoloration.
Powdery mildew (PM) affects clones and mold spores can move between plants. Look for white powder on stems and leaves if you discover a plant with powdery mildew.
A clone is nearly difficult to distinguish hazardous pesticides and fungicides on. These methods seldom leave a residue and can remain on the plant for the rest of its life. If you find any odd residue on a clone, inquire about the grower’s in-house integrated pest management (IPM) system, and always err on the side of caution.
Clean and quarantine your cannabis clones
If you pick up some plants at the store that appear to be healthy, yet your other clones look sick, take a few last safety precautions before introducing them to the rest of your garden.
To begin, bring your new weed cultivars into a more permanent location and medium. The grow media used to keep fresh cuttings at the store is frequently different than what you use. Furthermore, pests may be present in the medium that you purchased—moving your clone to a cleaner area can help reduce any potential root damage.
Take this opportunity to clean your clone properly with the IPM solution you prefer. A popular technique for cleaning new clones is dipping them in a light mixture of any safe and permitted pesticide.
After your clones have been cleaned and transplanted into their new medium, keep them quarantined for a few days to a week to protect the rest of your garden. You’ll be able to remove them easily if they do develop issues since you will know not to plant anything else in that part of the garden.
If they appear to be flourishing after a week or so, introduce them to the rest of your garden.


